1. Guide to Integrating NHV BOOT into Hard Drive (HDD/SSD) for USB-free Rescue
Creating a rescue boot menu directly on your internal hard drive gives you complete control, allowing you to access the WinPE environment even without a USB drive, external hard drive, or if Windows fails to boot due to system errors. This is the optimal solution for the following scenarios:
- Remote Windows Installation (Online): Allows technicians to safely reinstall Windows for clients over the network with 100% security.
- Locked USB Ports: Bypasses security restrictions on corporate computers that disable external device connections.
- Emergency Rescue: Ideal for urgent data backup or deploying Ghost files when a USB drive is unavailable.
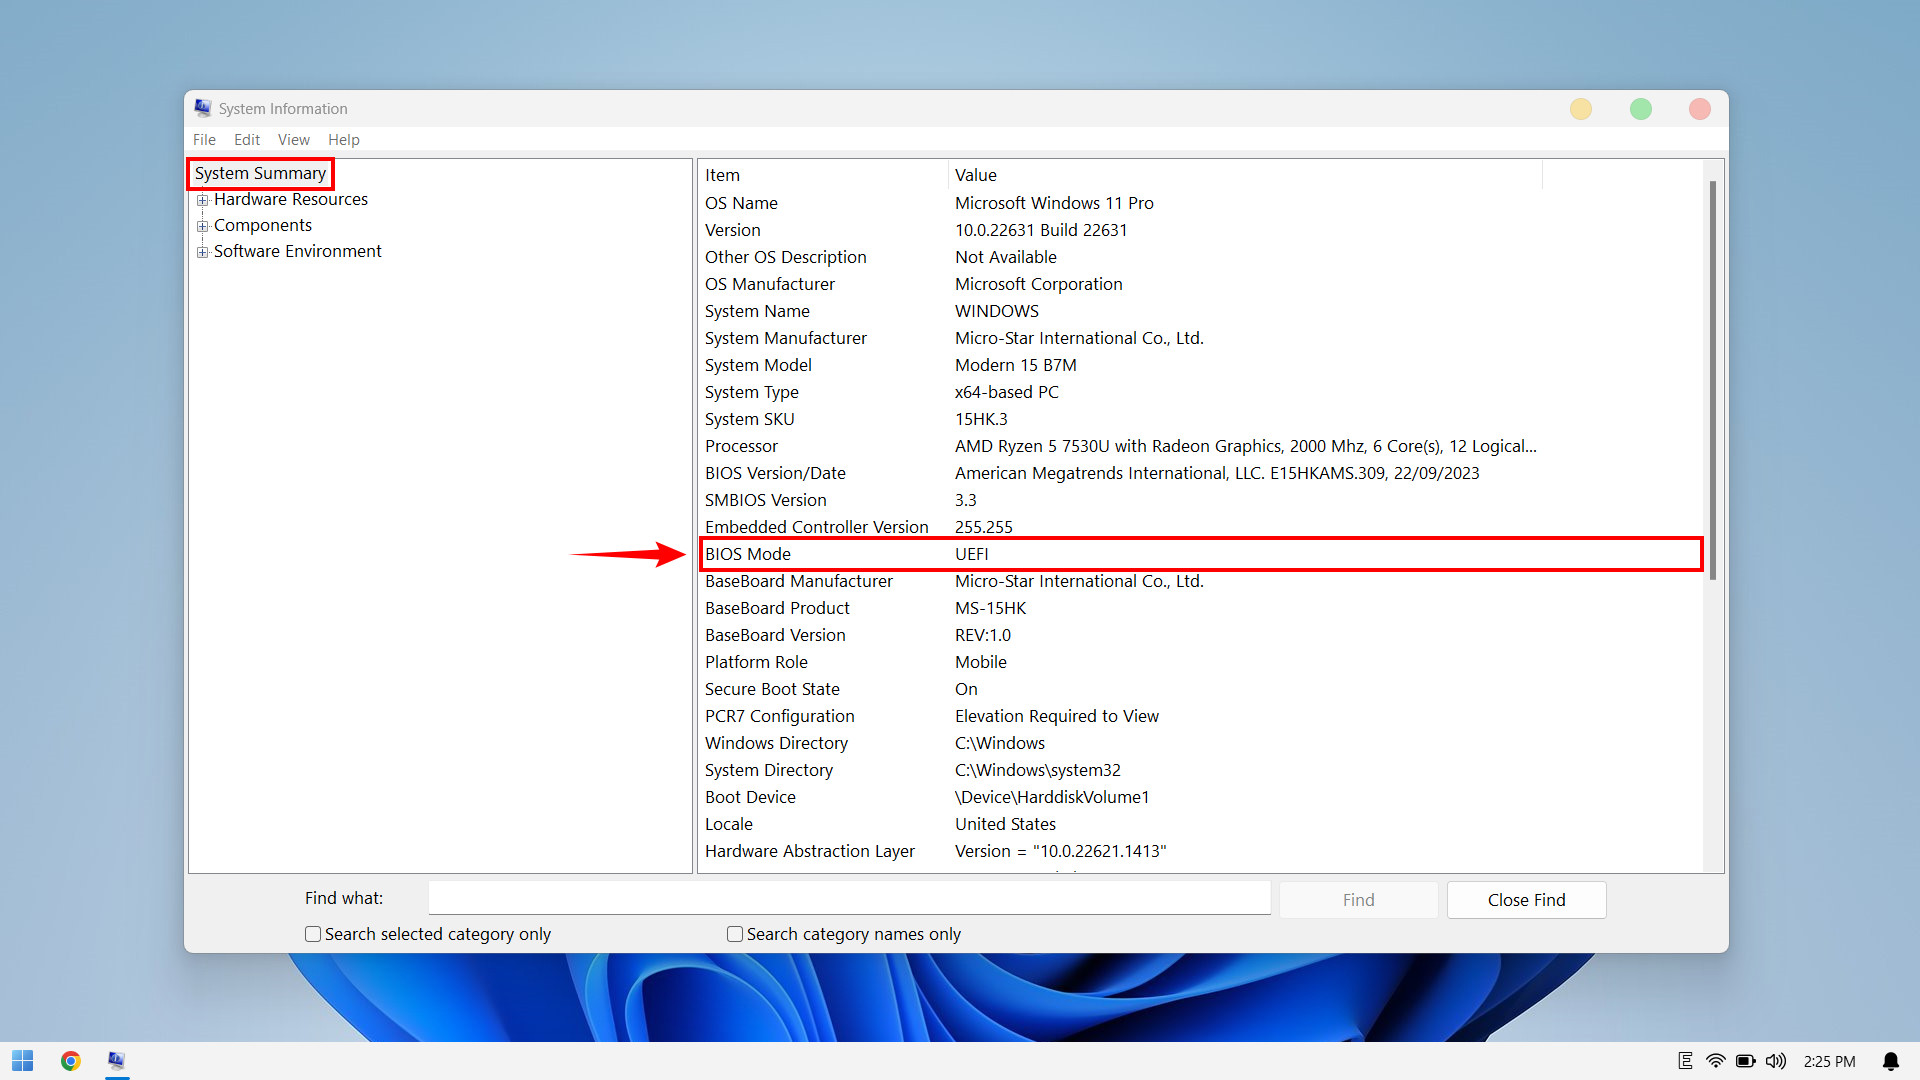
Important Note on Boot Standard: This method applies only to computers running UEFI (the default boot standard for most devices manufactured after 2012, which has largely replaced the older Legacy BIOS)
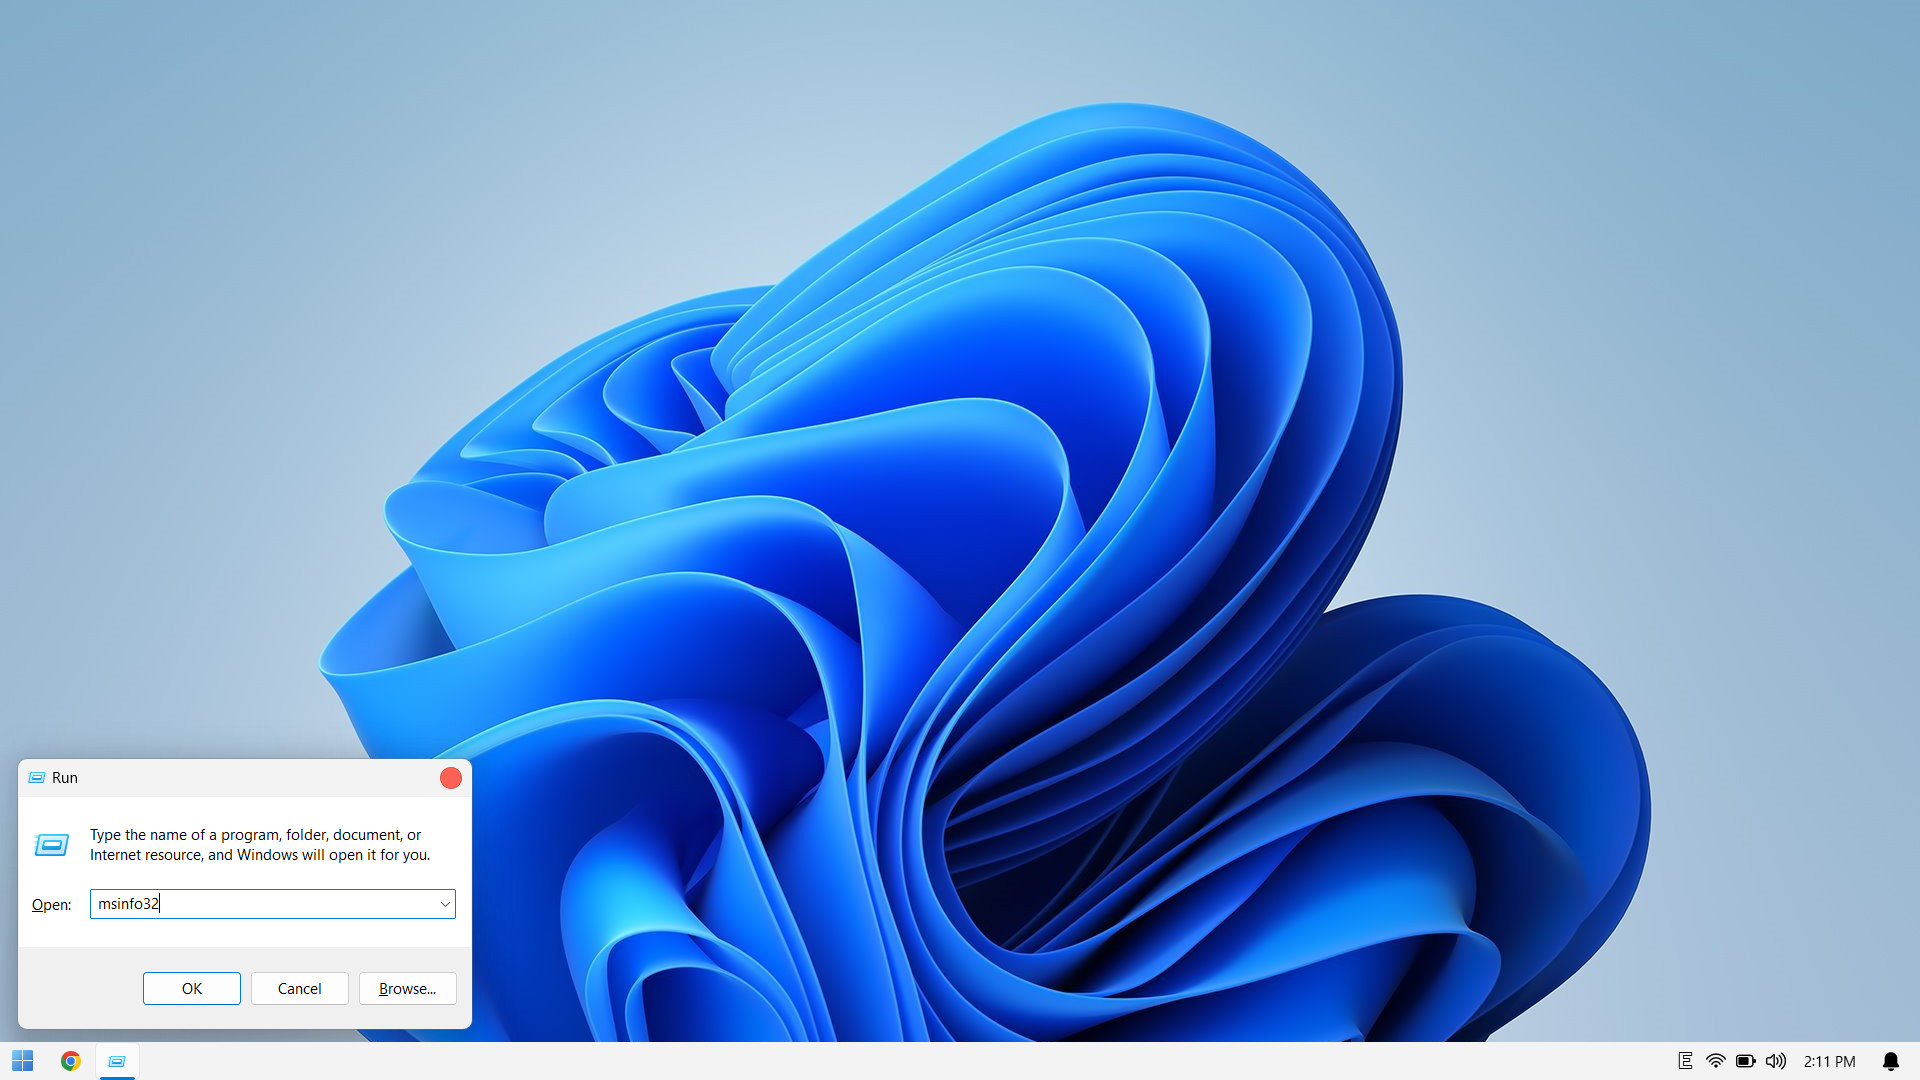
To ensure a successful installation, before starting, please open the Run dialog (press Windows + R), type msinfo32, and check the BIOS Mode line. If it displays UEFI, you can proceed with confidence
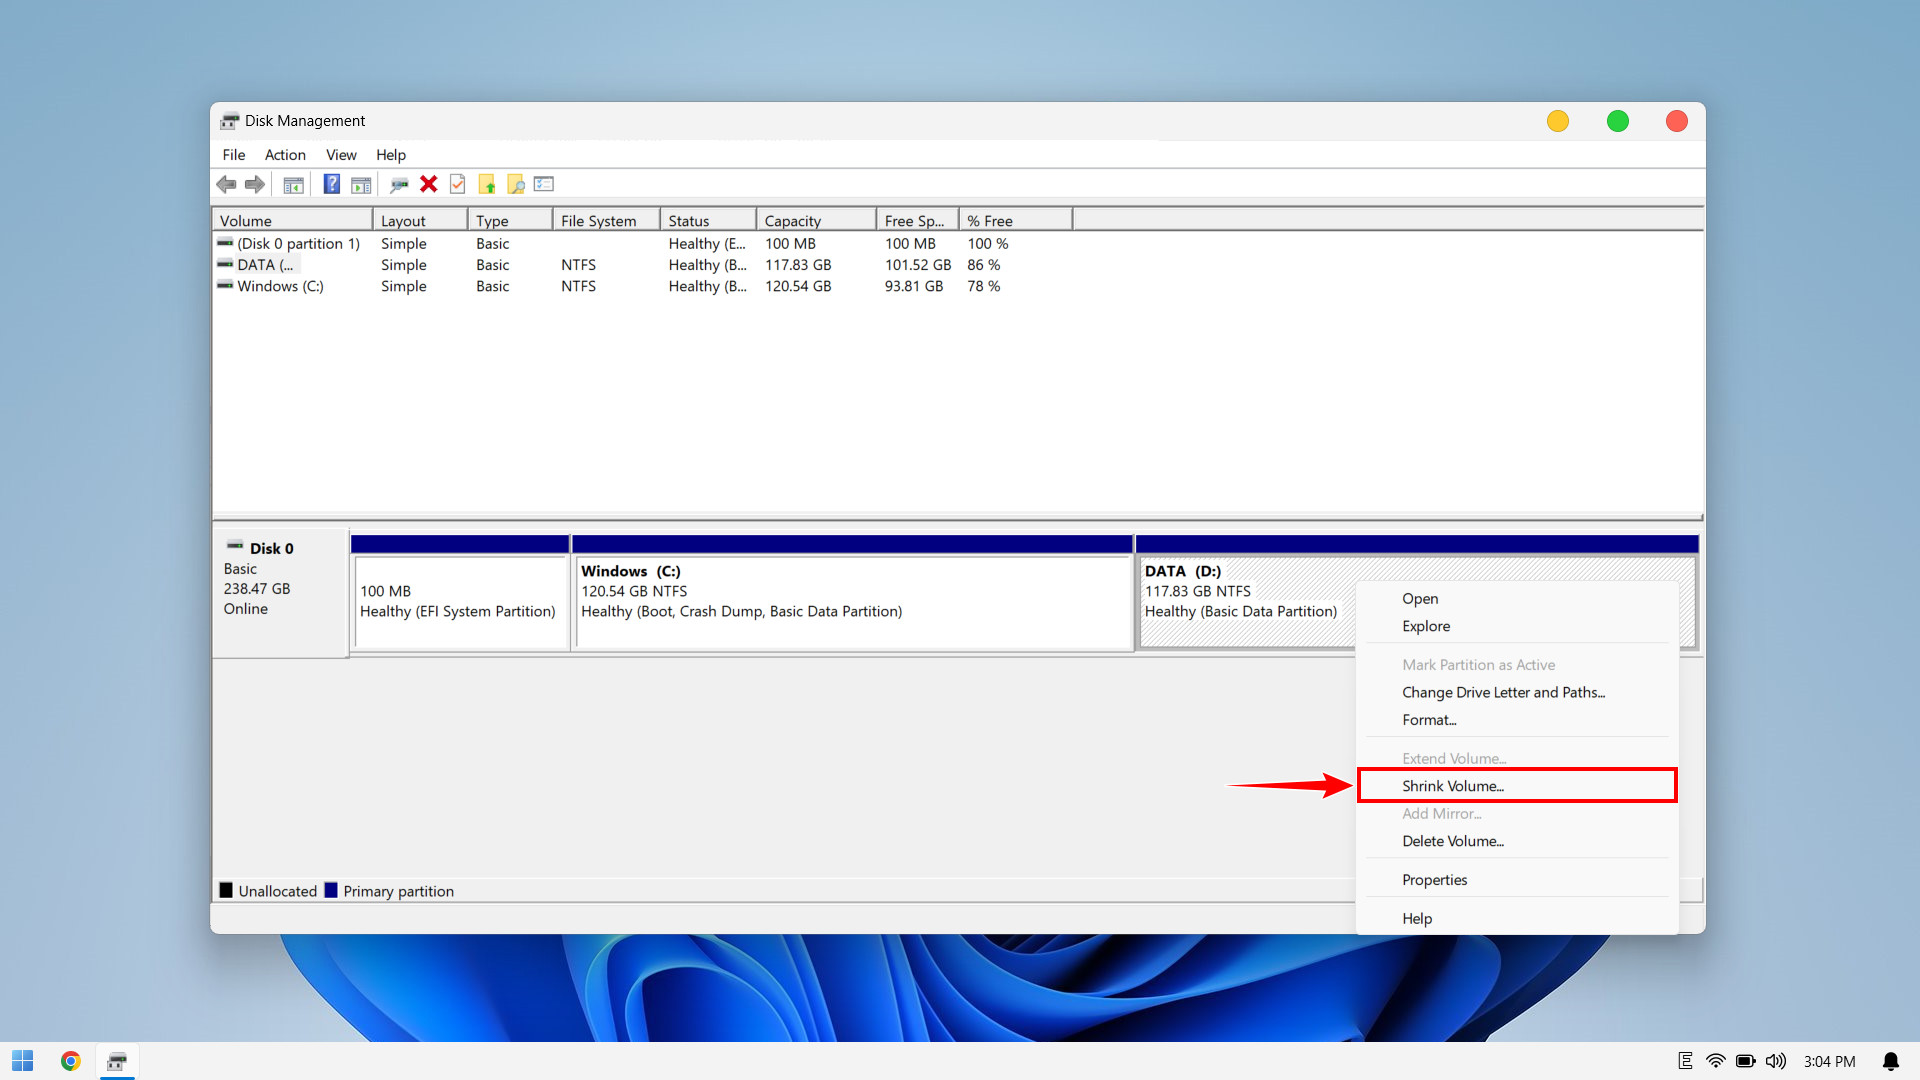
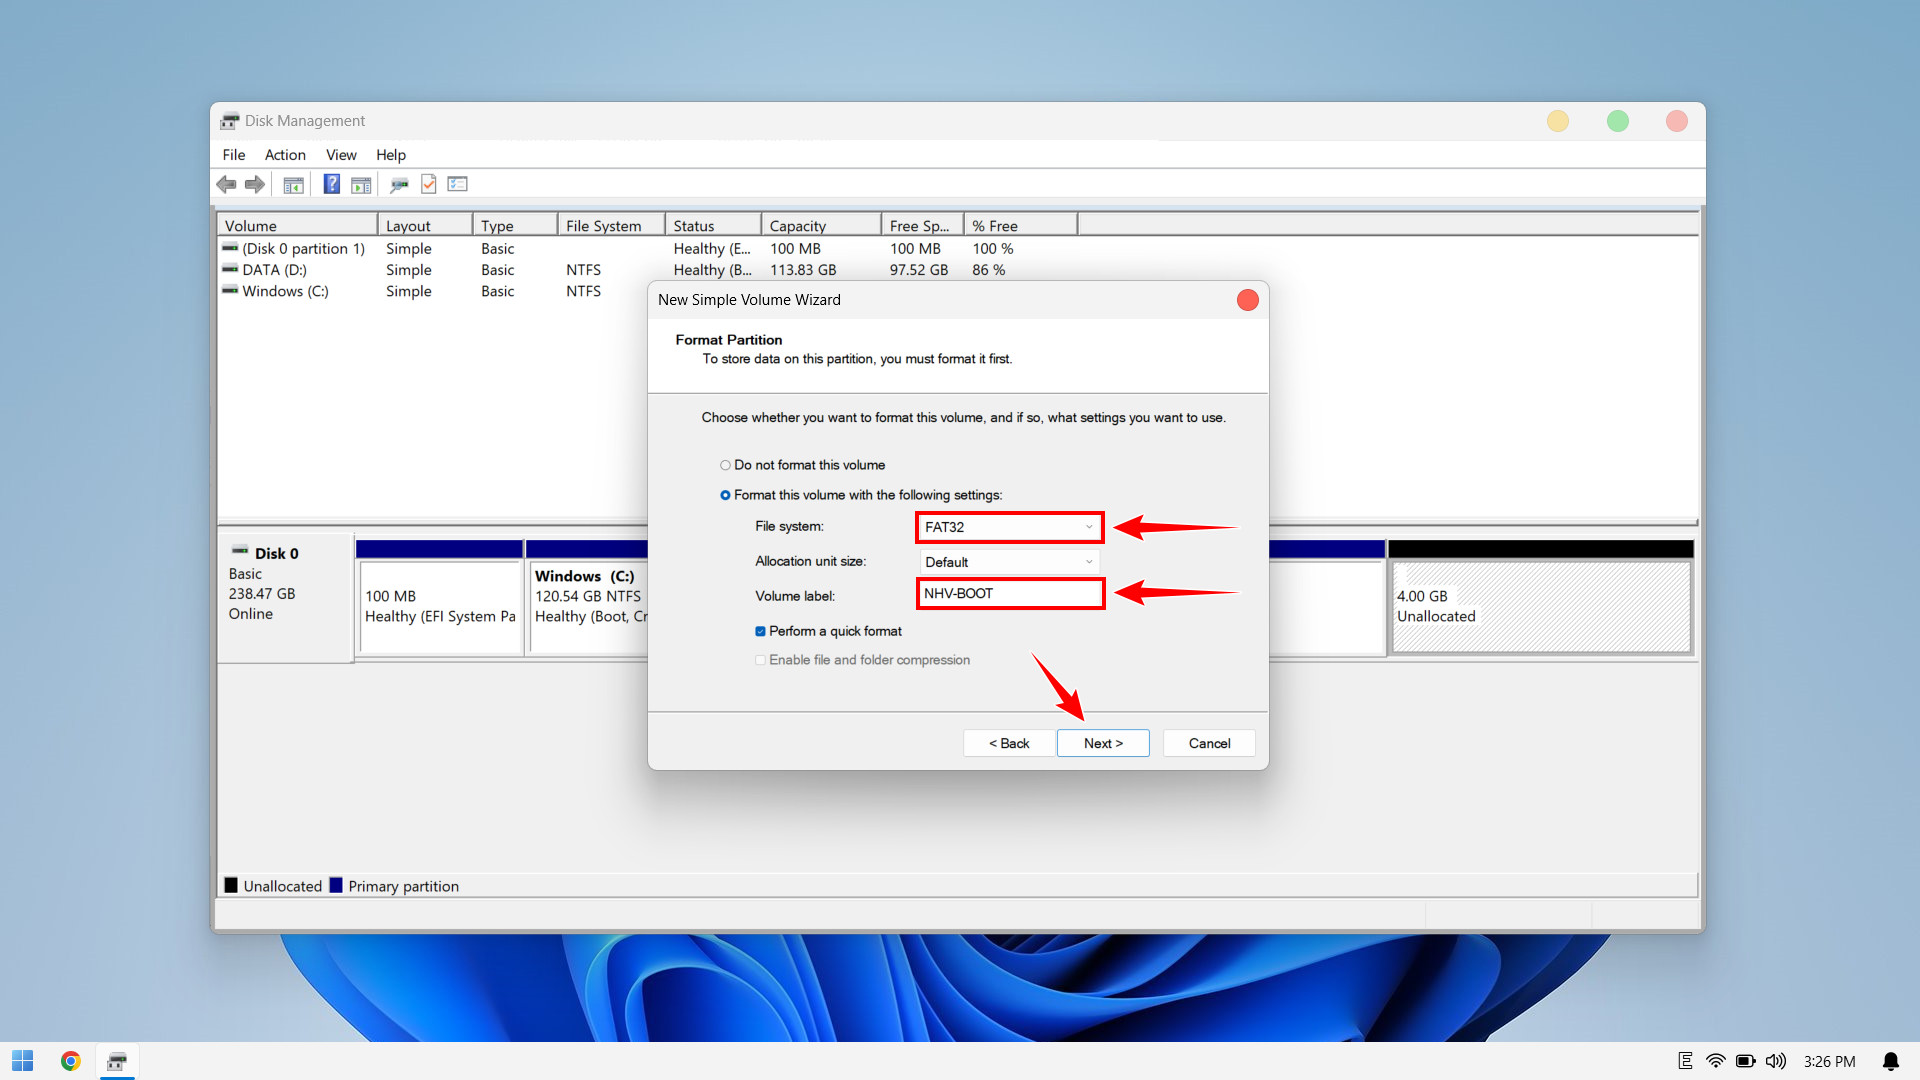
NHV BOOT requires a minimum of 4GB FAT32 partition. To create a partition for NHV BOOT, follow these steps:
Open Run and type “diskmgmt.msc“, or right-click on This PC -> Show more options (Windows 11) -> Manage -> Disk Management
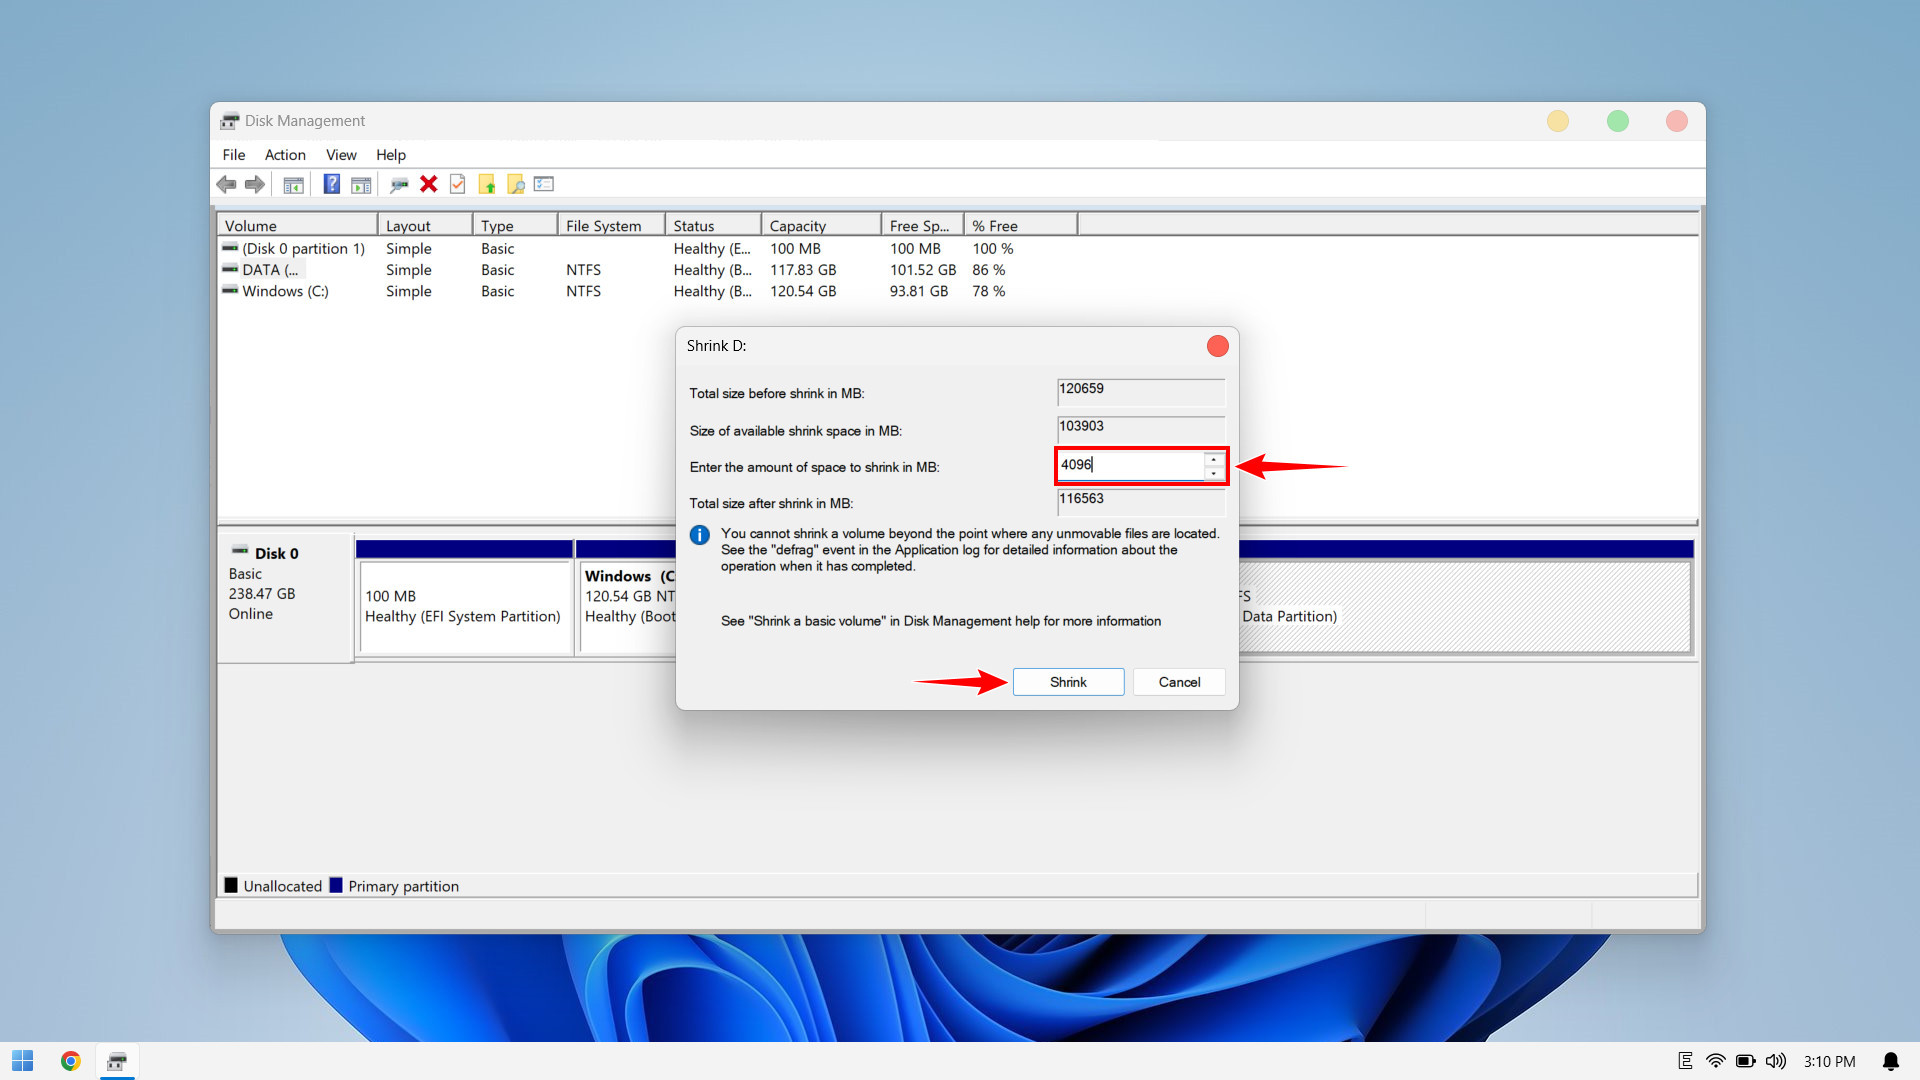
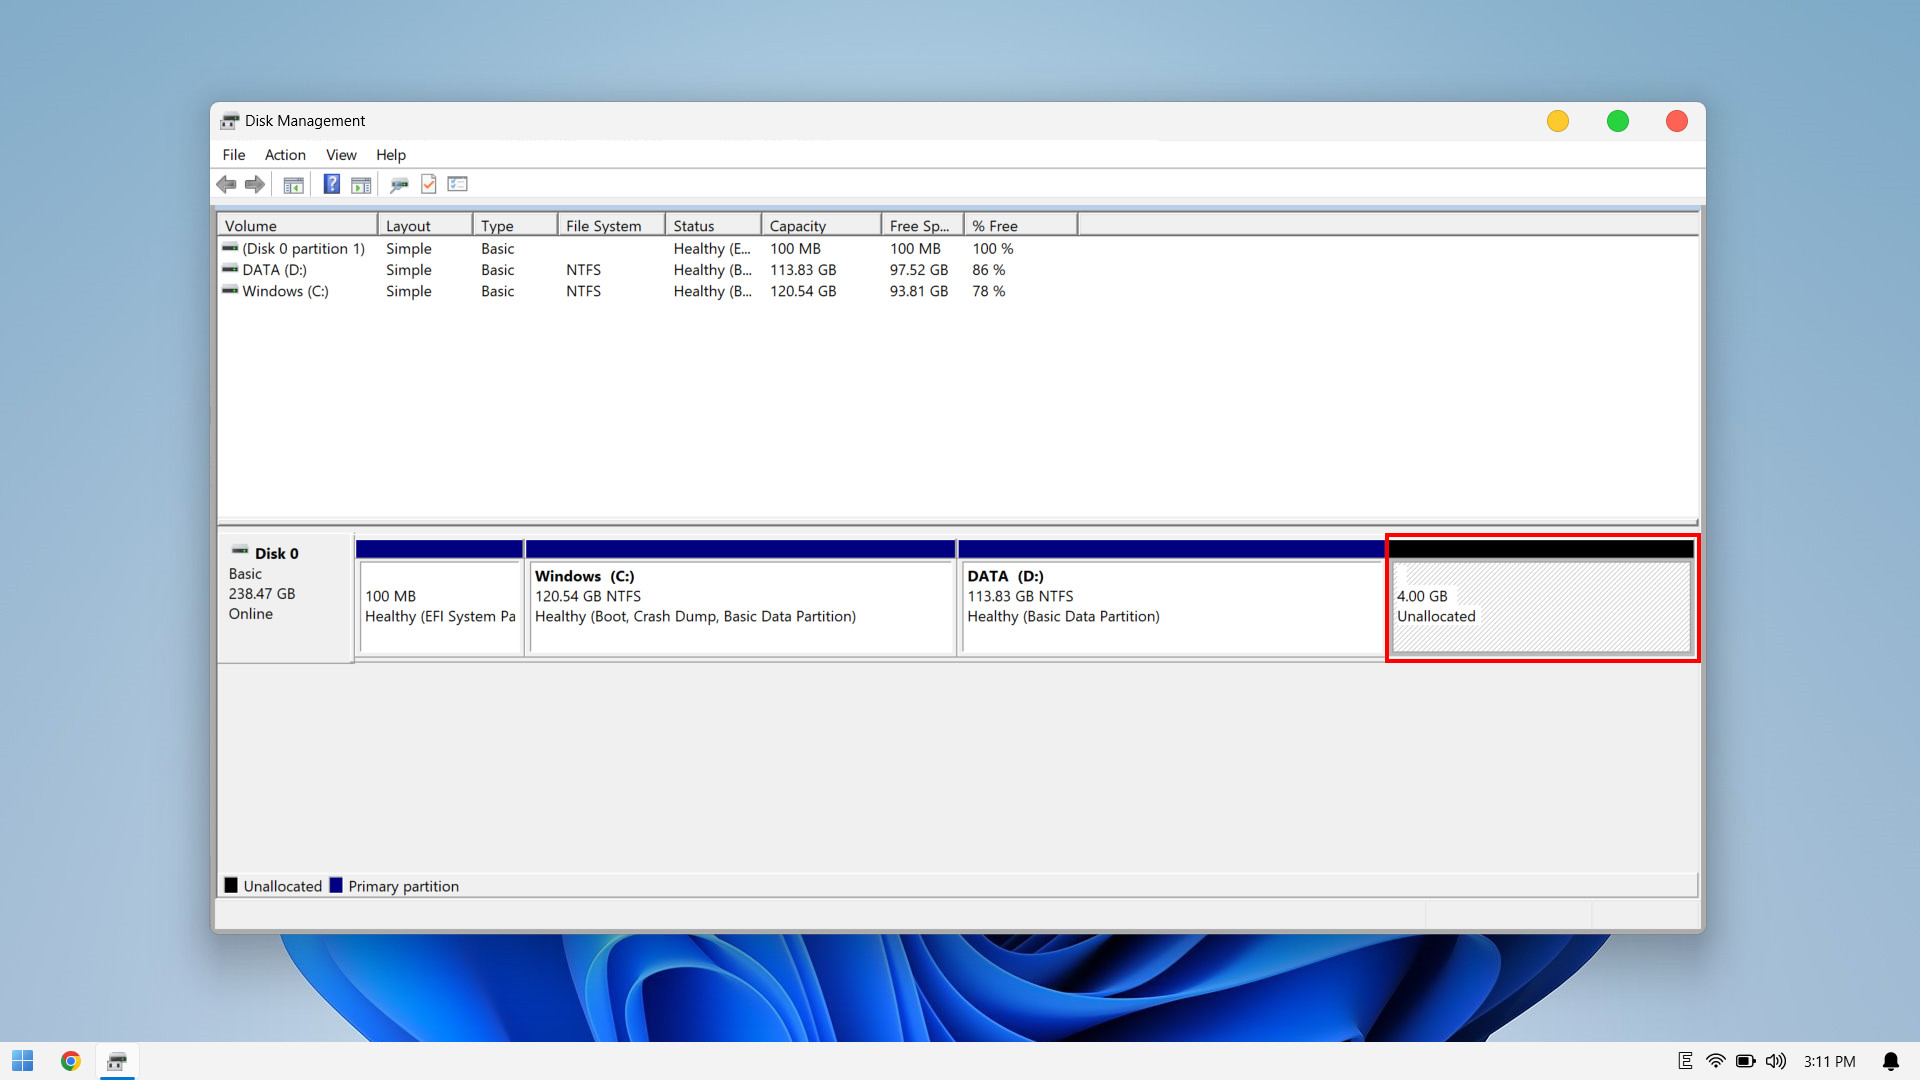
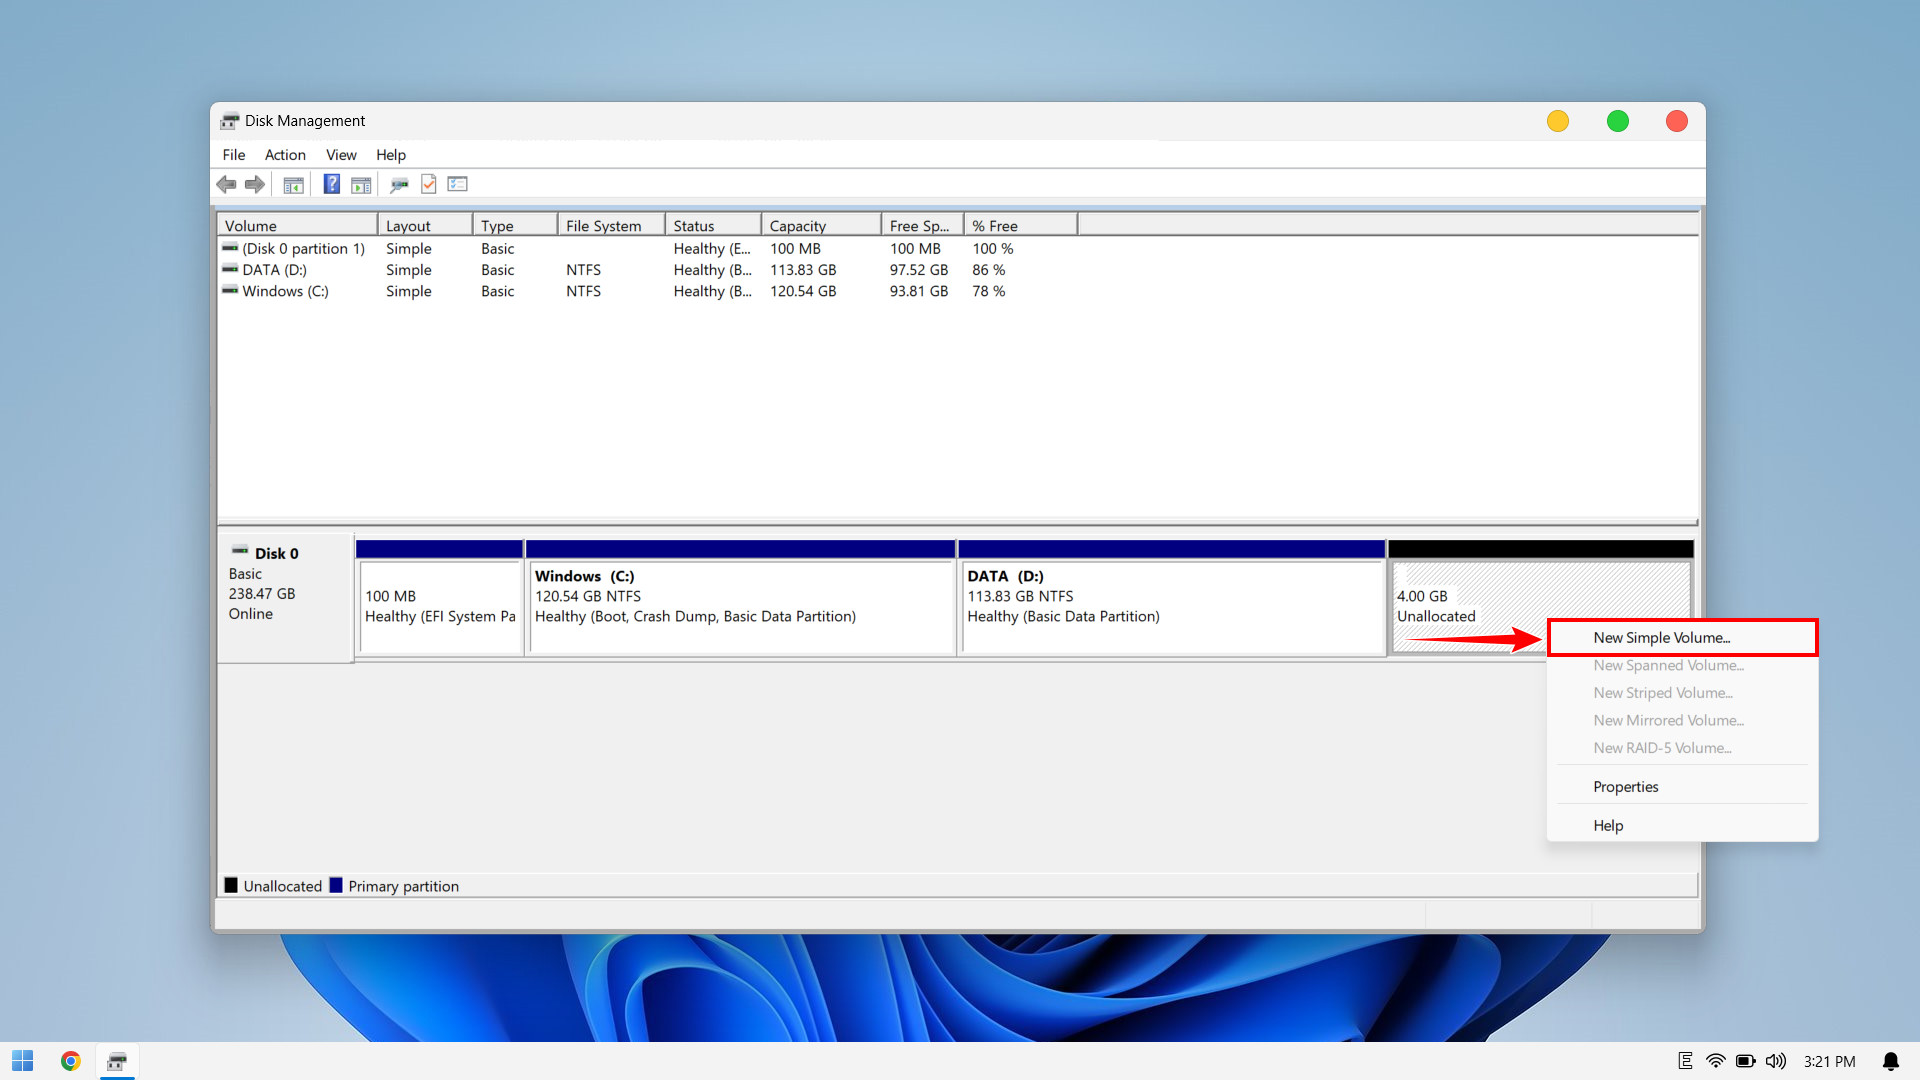
Next, click Next -> Next -> Next
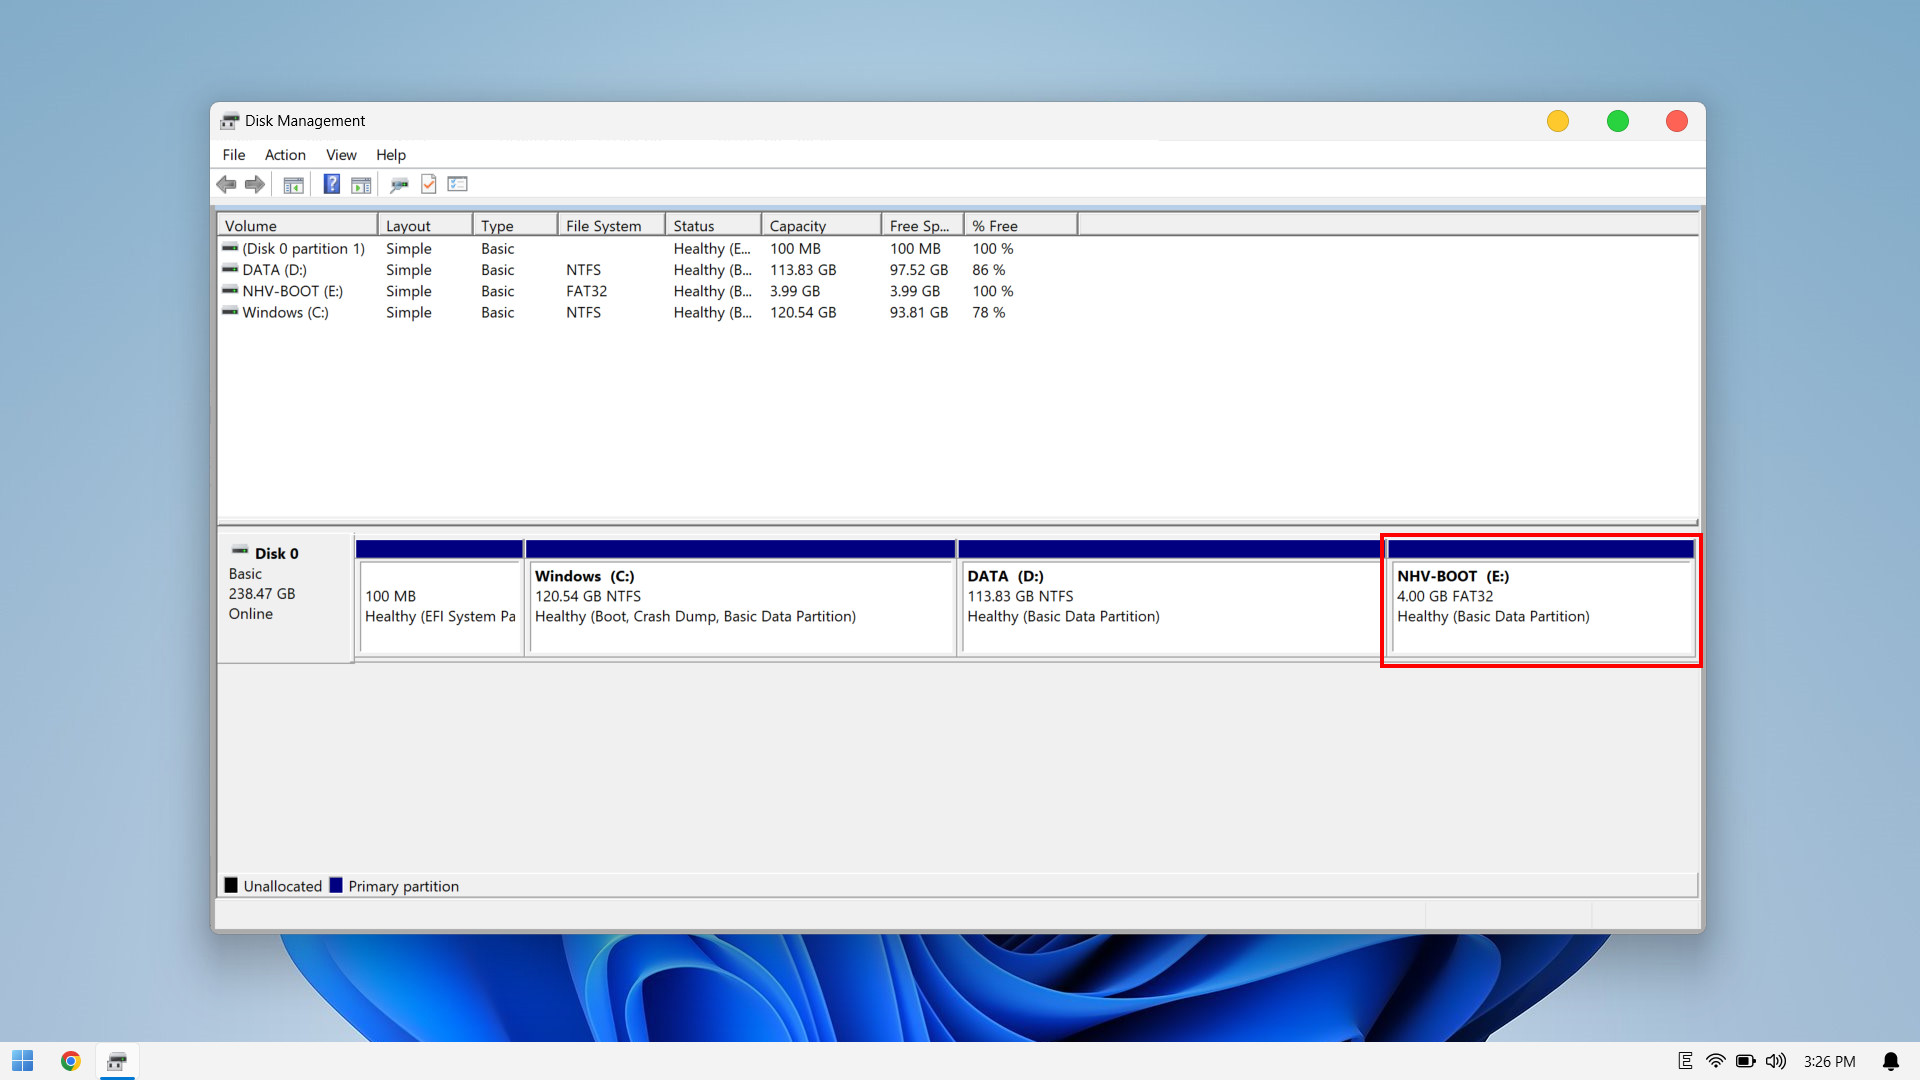
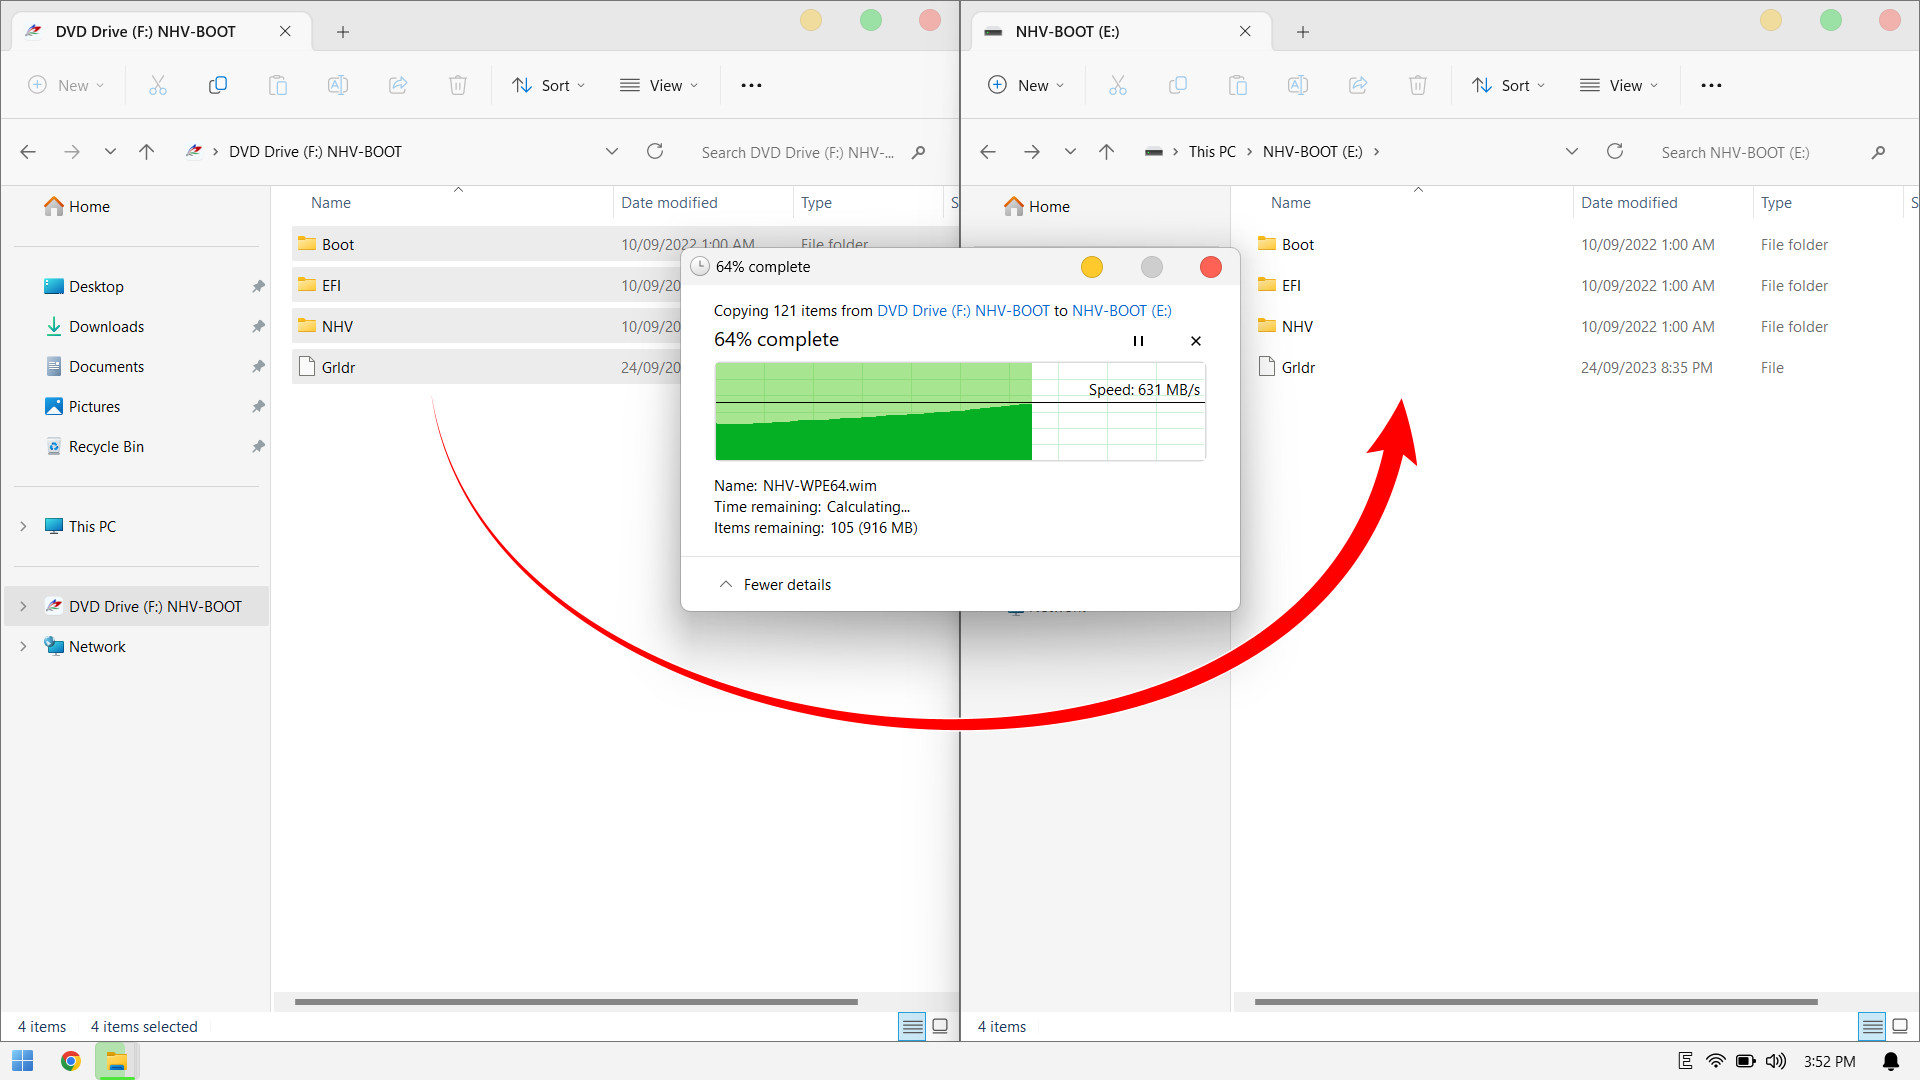
Next, open the NHV BOOT ISO file and copy all data to the newly created 4GB FAT32 partition
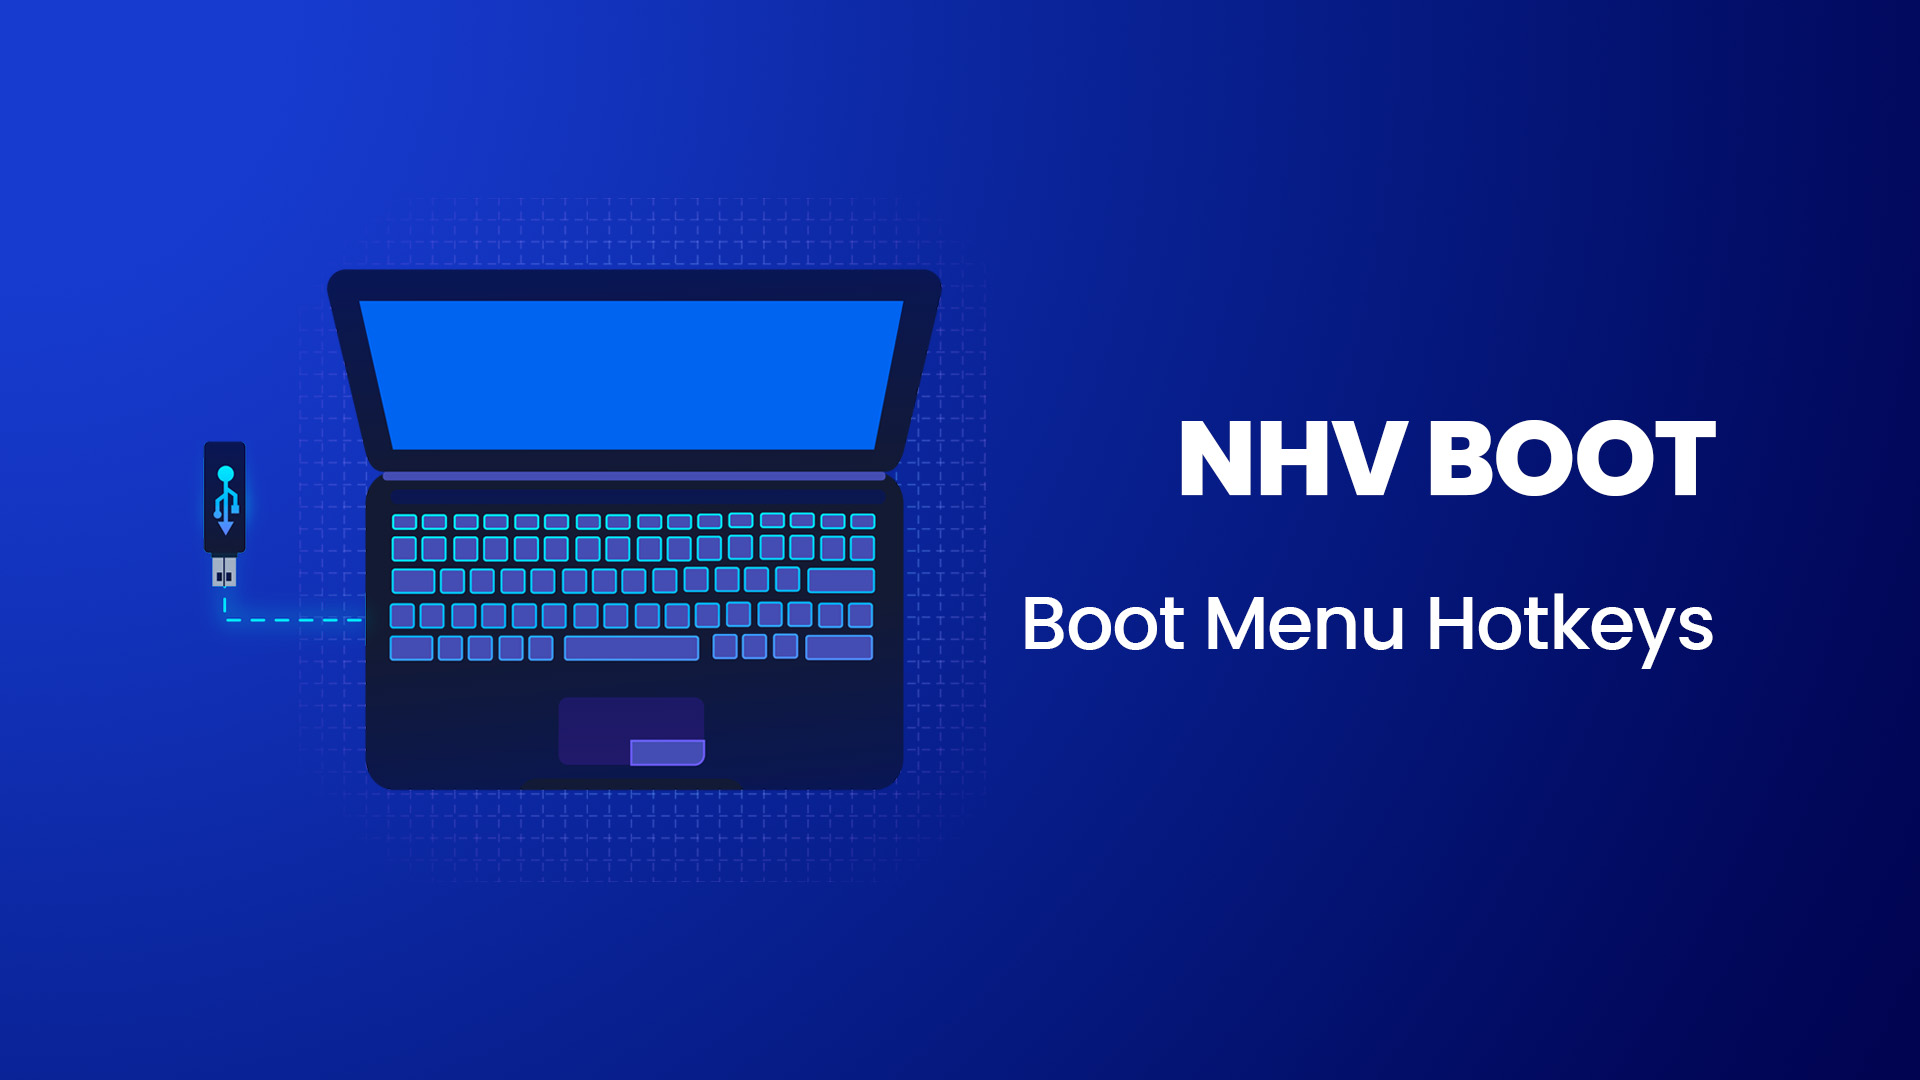
To enter NHV BOOT WinPE, follow these steps: Restart your computer and repeatedly press the Boot Menu key
Example: On an MSI Laptop, restart and continuously press the F11 key to display the boot menu as shown below
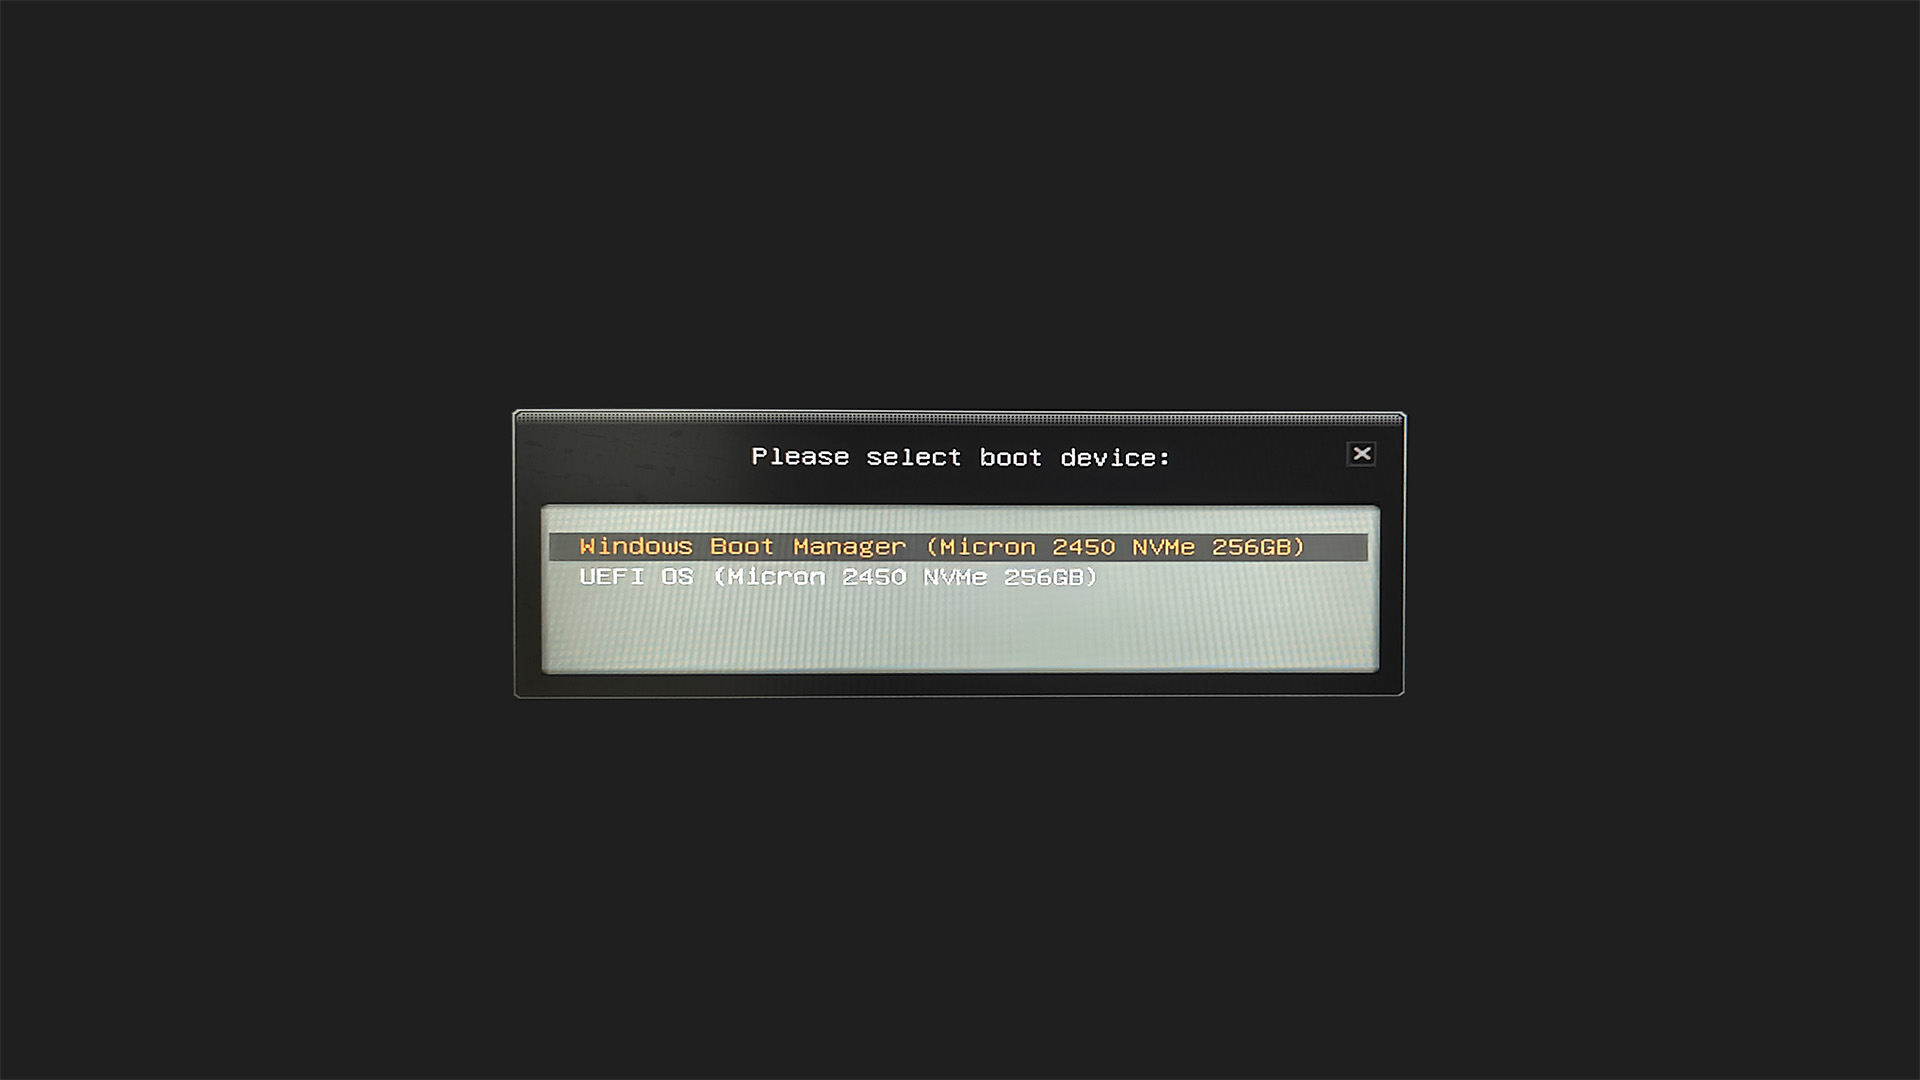
Thus, the process of integrating NHV BOOT into your internal hard drive is complete. From now on, whenever you need to access the WinPE rescue environment, simply restart your computer and repeatedly press the Boot Menu key (e.g., F12, ESC, F9… depending on the manufacturer).
In the boot device list, you will see a new entry: UEFI OS (the NHV BOOT partition). Select it to boot into WinPE anytime you need.
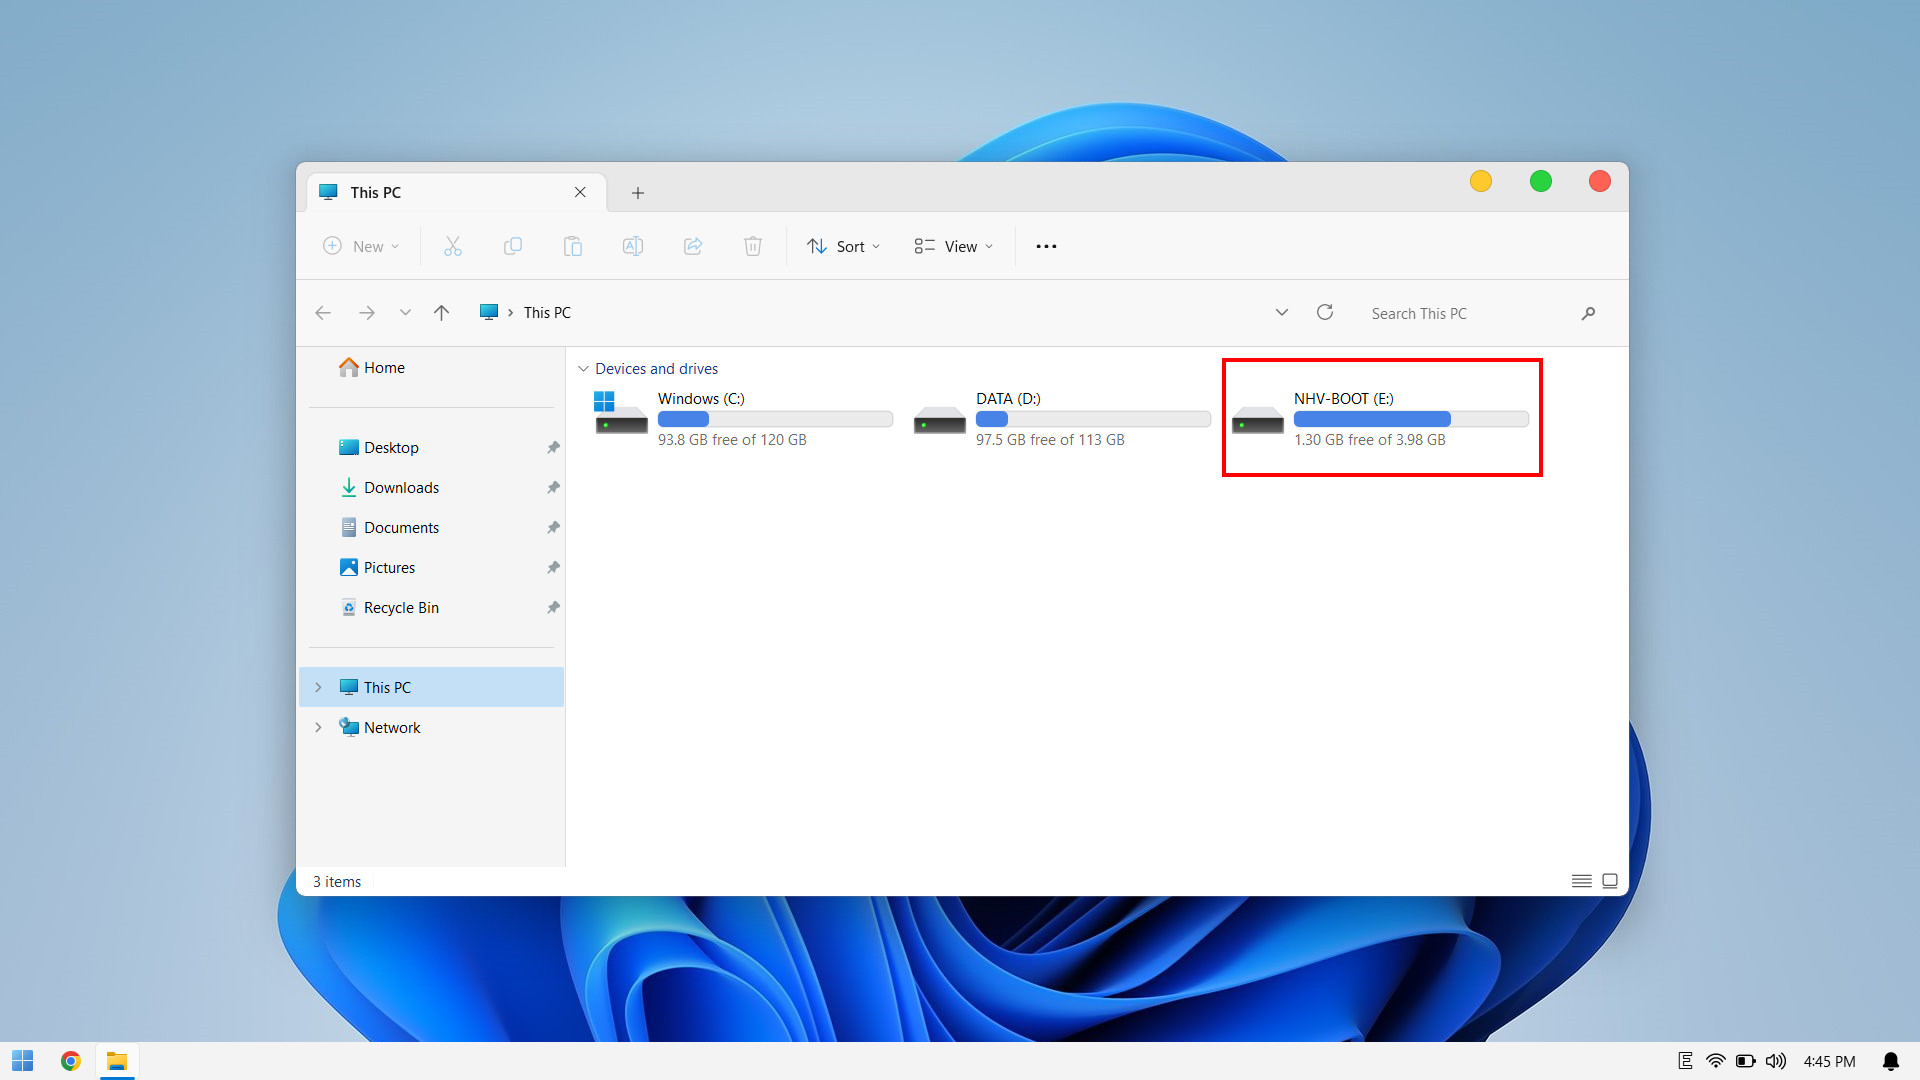
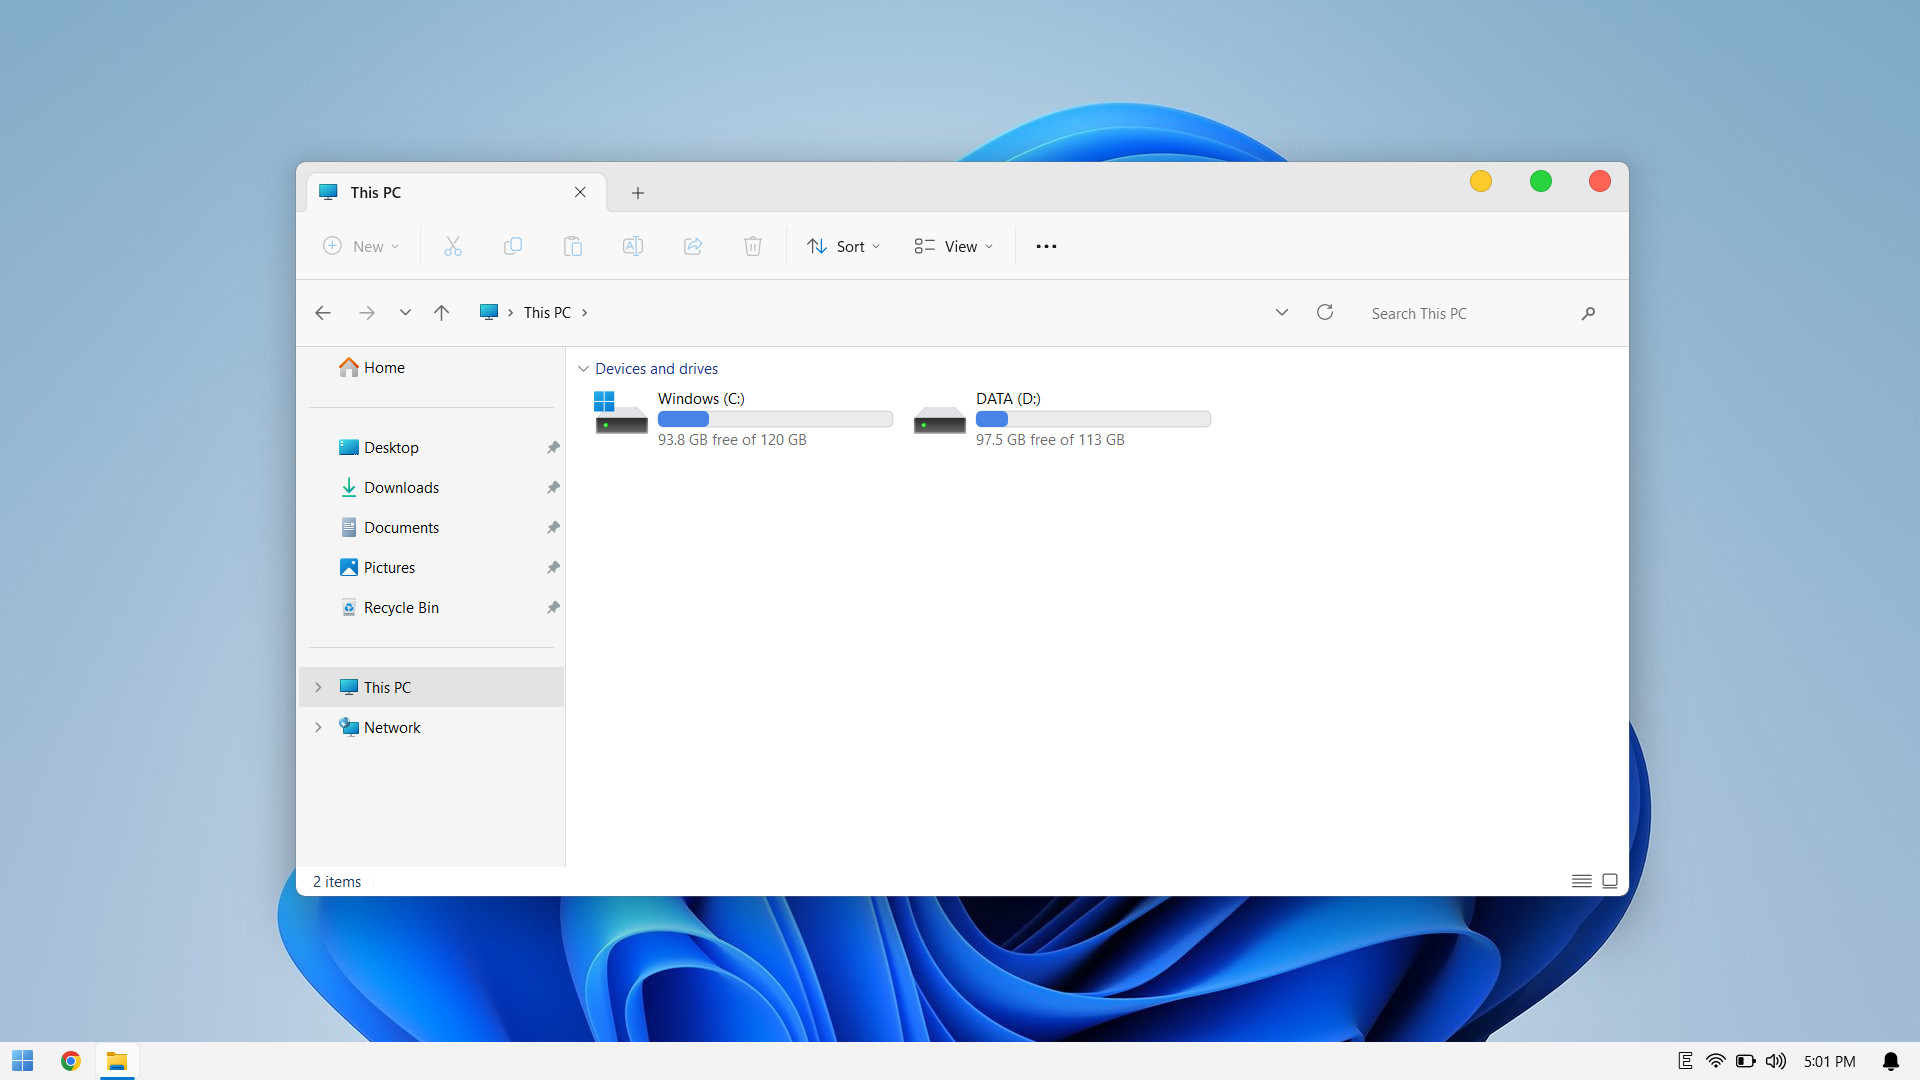
However, the NHV BOOT partition is currently visible in This PC (Windows Explorer), which may clutter your interface. To keep things organized and prevent accidental data deletion, let’s proceed to the next step.
2. How to Hide the NHV BOOT Partition
Hiding the NHV BOOT partition keeps your Windows Explorer organized and prevents accidental modifications or deletion of data on this partition. Rest assured, even after hiding it, you can still boot into WinPE normally
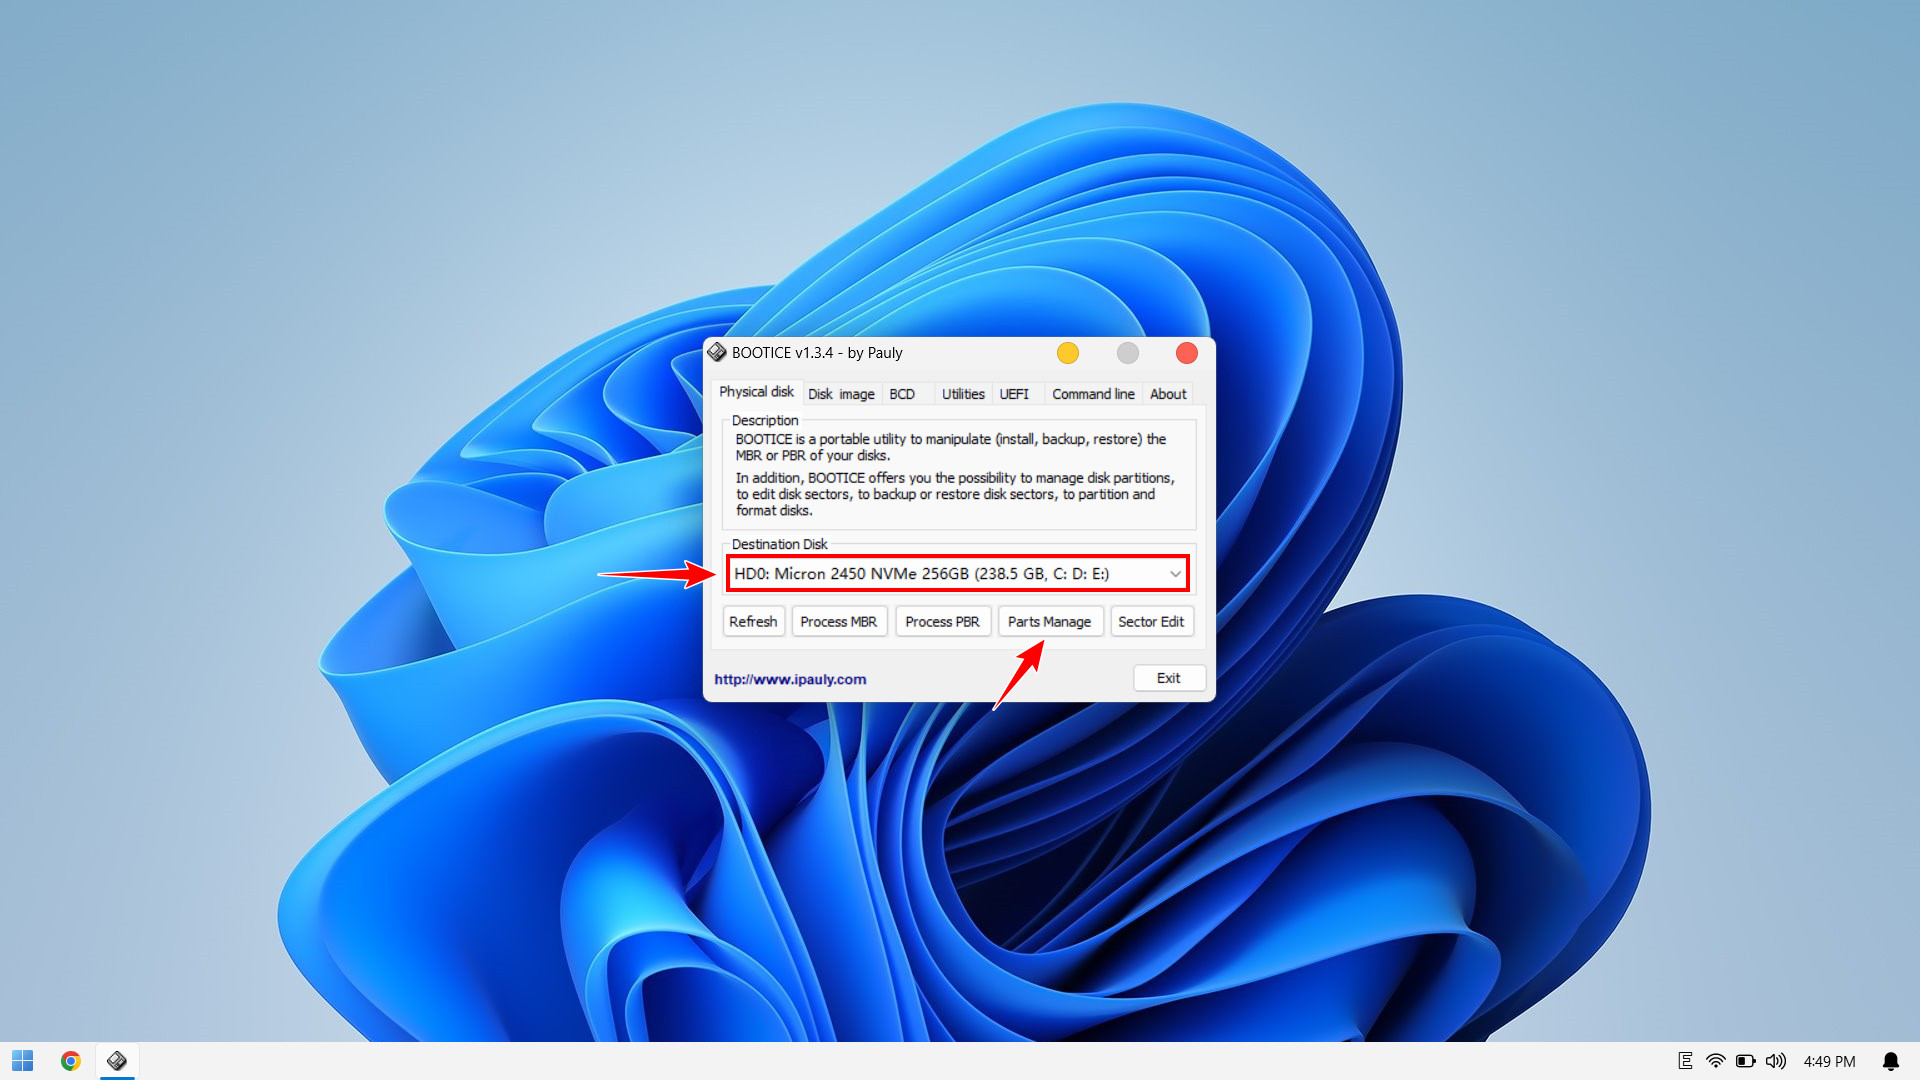
Download and open the BOOTICE software to proceed with the steps to hide the NHV BOOT partition
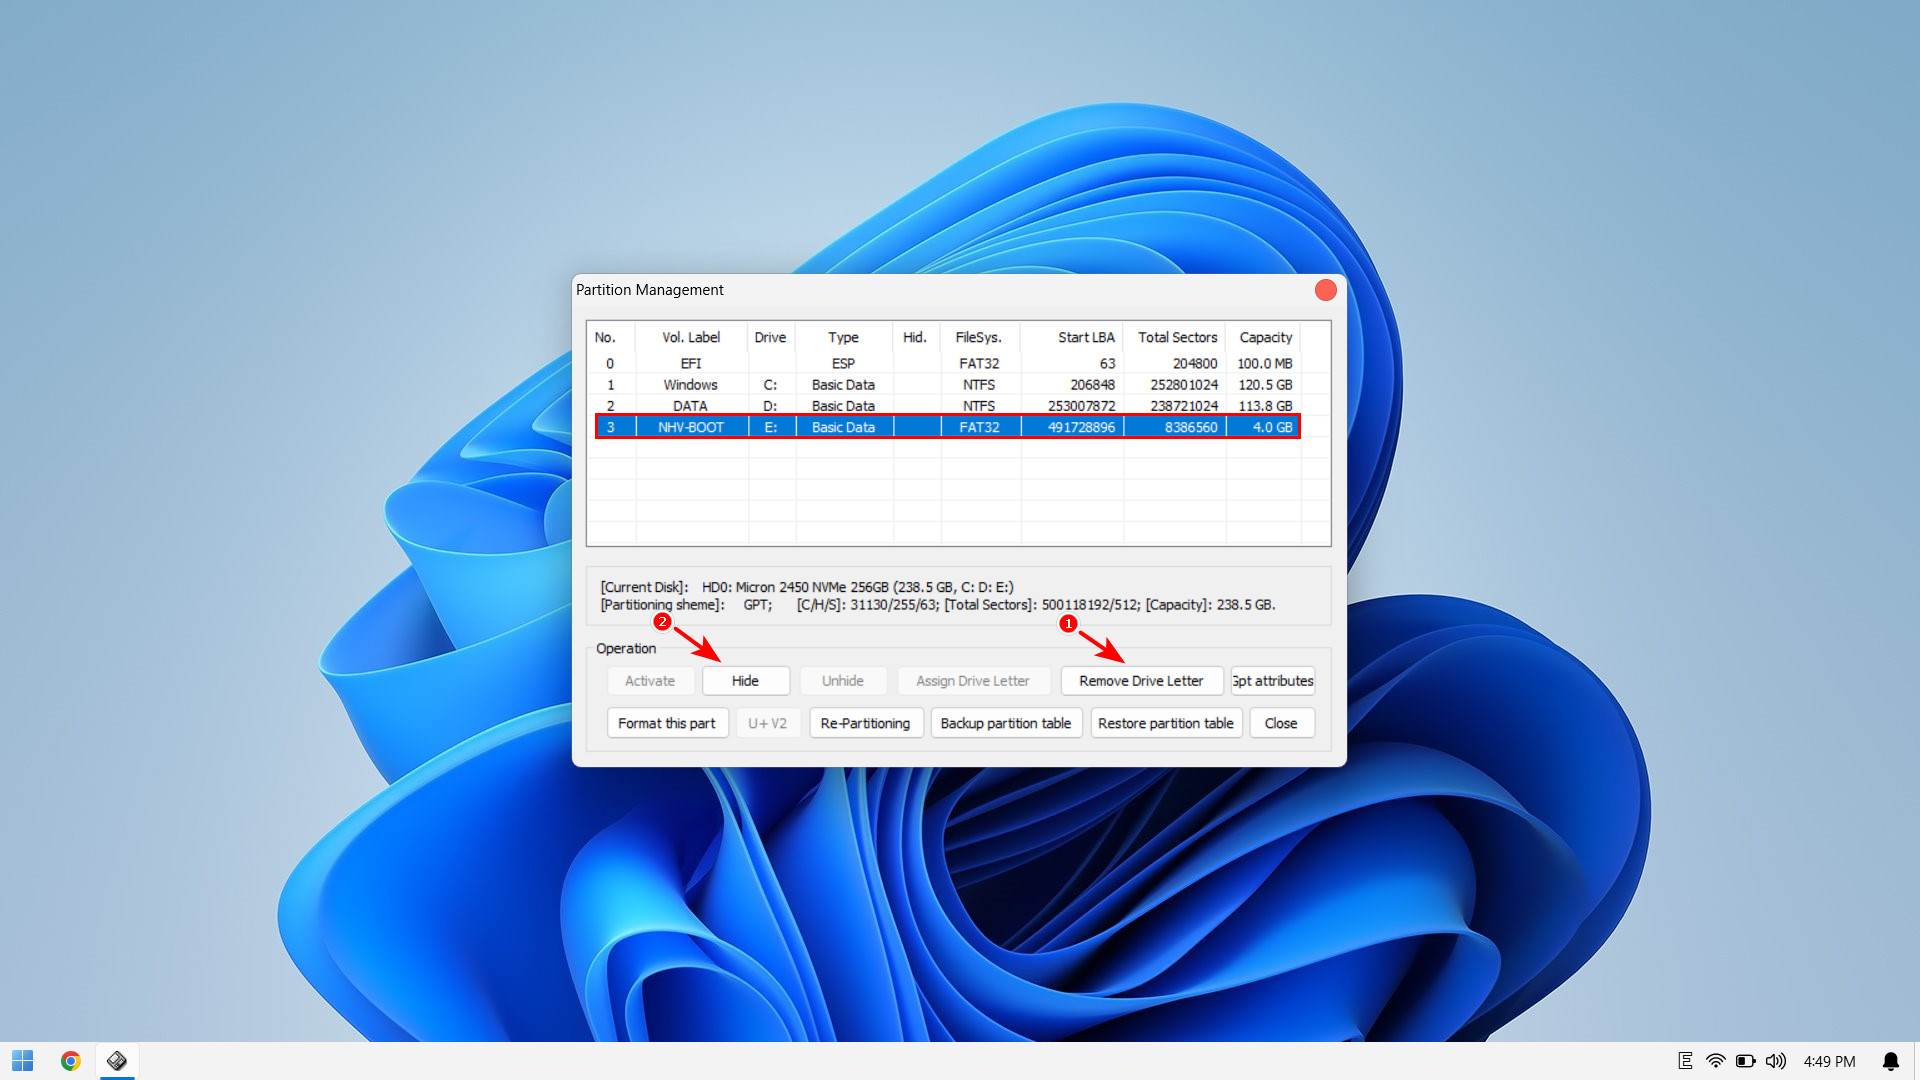
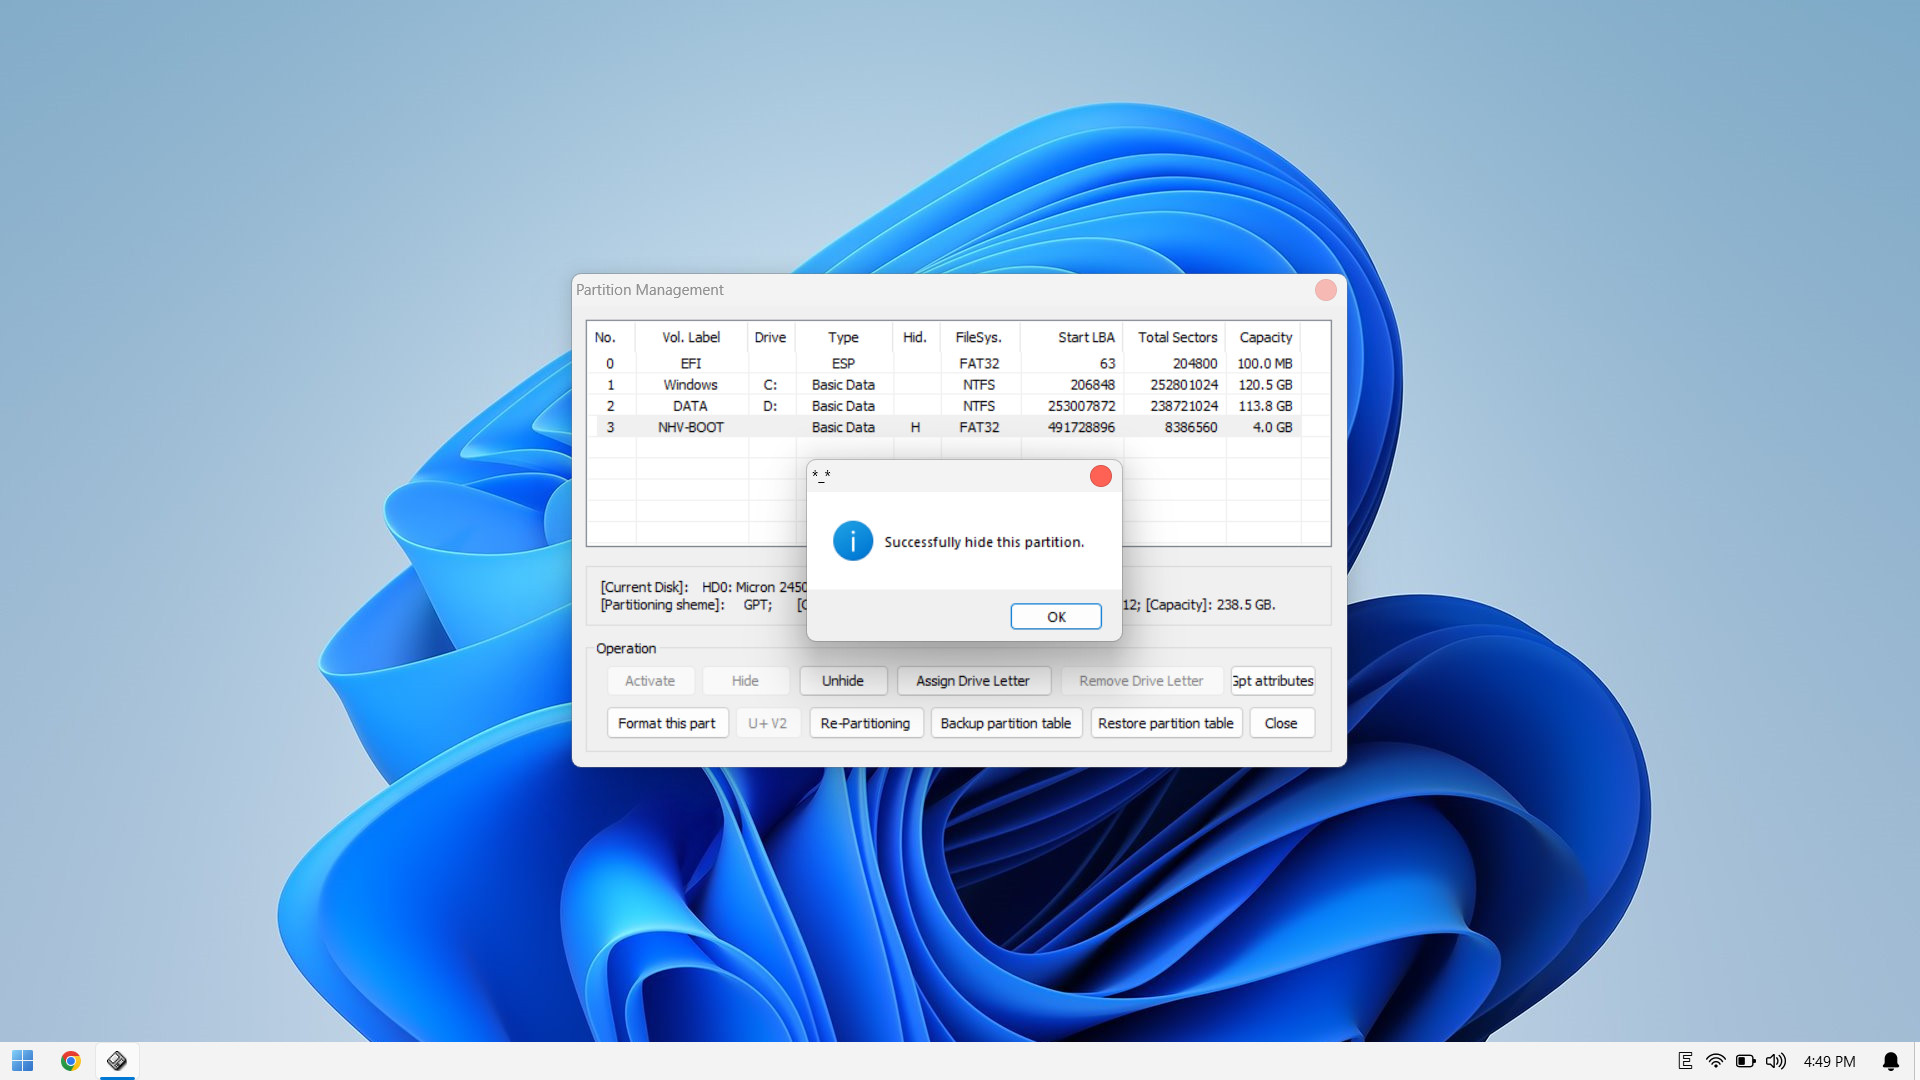
With that, we have successfully hidden the NHV BOOT partition, keeping your Windows interface clean and organized. As you can see, integrating NHV BOOT directly into your internal hard drive is a simple, safe, yet highly effective solution for system rescue tasks.
⚠️ CRITICAL TECHNICAL WARNING: This method must ABSOLUTELY NOT be applied to computers running in Legacy mode.
- Reason: On older standard MBR drives (Legacy), the system allows Set Active for only one partition at a time.
- Consequence: If you attempt this on Legacy systems, “Setting Active” for the NHV BOOT partition will strip the Windows partition of its boot authority, rendering your computer unable to boot into Windows.
We hope this guide provides you with a powerful backup rescue strategy. Don’t forget to download NHV BOOT and purchase a license to experience all the advanced features!